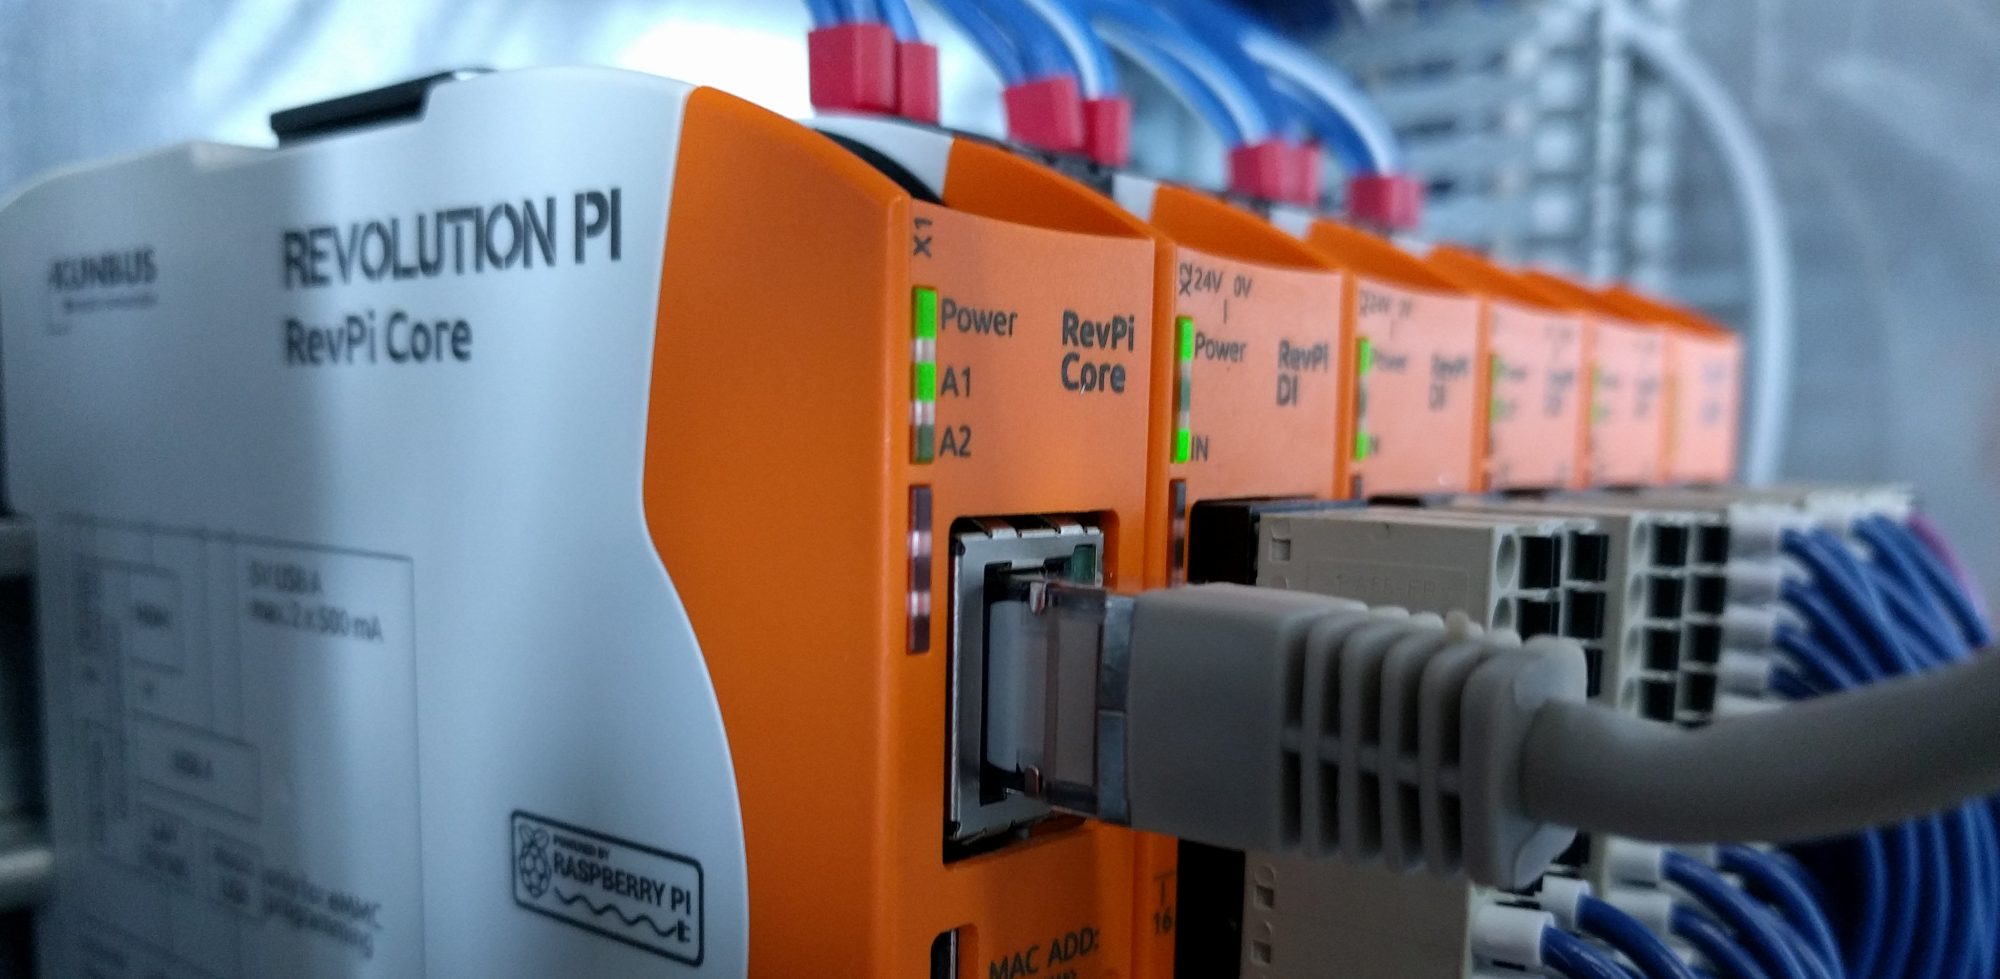
At RevPiDay 2018, we introduced you to our RevPiPyLoad extension, which allows us to use NodeRed on the Revolution Pi very easily thanks to MQTT. Here we show you how it works.
Installation of the required software
In this example we will install all components directly on the Revolution Pi. Of course, the MQTT broker and NodeRED could also be installed on other systems in the network, then change the addresses of “localhost” to the respective addresses of the systems.
- RevPiPyLoad: System for control program, IO-Checks and MQTT transmission
- mosquitto: MQTT Broker
- NodeRED: Interface for our visualization / control (already on the Revolution Pi)
pi@RevPi ~/ $ sudo apt-get update

# Install
pi@RevPi ~/ $ sudo apt-get install revpipyload mosquitto mosquitto-clients
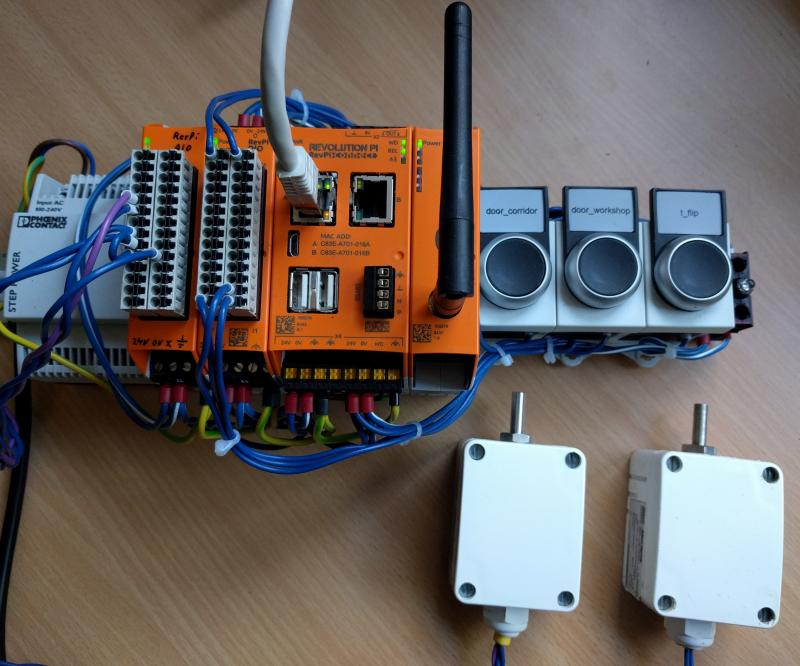
Setup of the hardware
In our example we use a revolution Pi with a DIO and AIO module attached to it. We have connected two PT 100 temperature sensors to the AIO. The DIO module was wired with three buttons and two LEDs.
It is our system, which we explain in our Quickstart! There you will also find information for setting up piCtory and the graphical configuration tool.
Configure RevPiPyload for MQTT
The simplest variant of the configuration is the use of our graphical configuration tool RevPiPyControl. Before we can access the Revolution Pi, the XML-RPC interface in RevPiPyLoad must be activated. You can read this in detail in “RevPiPyLoad Installation on the RevPi” in our quick start.
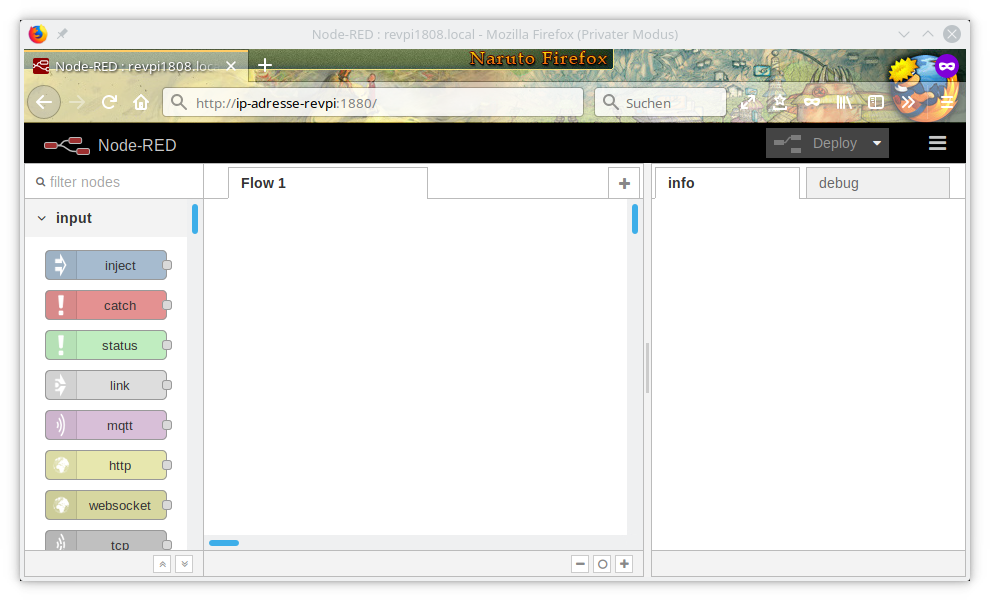
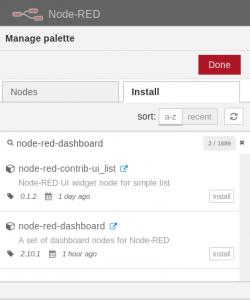
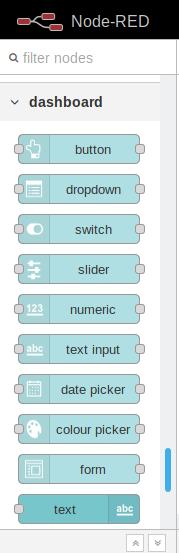
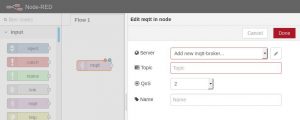
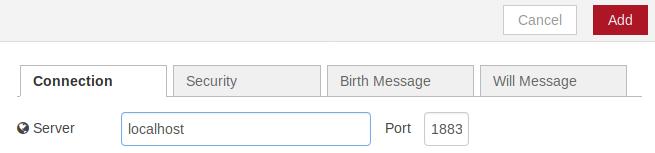
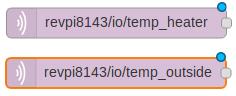
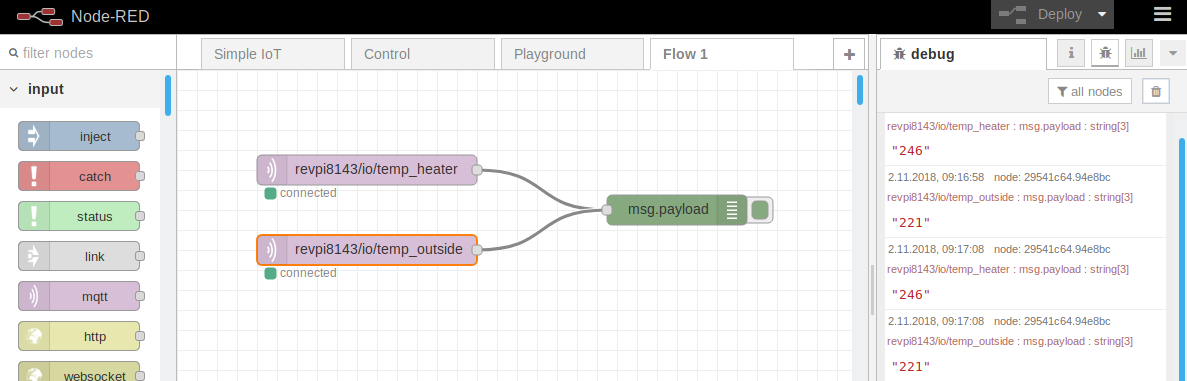
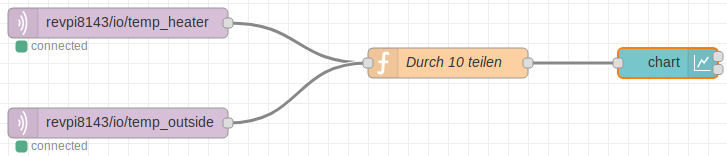
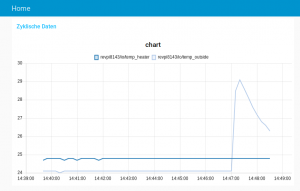
If a connection via RevPiPyControl with the Revolution Pi is established, open the options via “PLC-> PLC options…”. In the lower part you find “MQTT process image publisher”. This option will be activated! The “Settings” button is used to configure the MQTT parameters. If we want to receive data immediately upon change, e.g. for the real-time display of temperatures, we need to enable “Send exported values immediately on value change“. In our example necessarily activate! If you want to set outputs from NodeRed, we enable “Allow MQTT to set outputs on Revolution Pi“. For our example, please also set this value to active! Apply all settings with the “Save” button. The system is now started and sends the values of the IOs for which the “Export” tick is active in piCtory every 15 seconds to the local broker. We can also edit the RevPiPyLoad configuration file directly on our Revolution Pi and enable MQTT. For this we open it in a text editor: In the editor we find all MQTT settings in the [MQTT] section. We set We also need Now save the change with Ctrl + X and confirm the saving with y. The RevPiPyLoad service must now be restarted to apply the changes. From now on, RevPiPyLoad sends the values of the IOs for which the “Export” tick is active in piCtory to the broker every 15 seconds. Small test directly on the Revolution Pi Directly on the Revolution Pi, we are now testing whether the values are really transferred. For this we use mosquitto_sub, which we installed with the package mosquitto-clients: The entries with To trigger events, we can also press a button on our hardware setup, which gives a signal to an input. After getting the IOs via MQTT, we can configure the NodeRed of the Revolution Pi. In our example, NodeRed should always start automatically with the Revolution Pi and we want to be able to install / update new nodes comfortably via “Manage palette”. Depending on the image version, we have to perform different steps. Please check which version is running on the RevPi: On the Jessie image we have to perform a node-update, in addition to the normal steps. After the first start, we give NodeRed some time to initialize. Now we can open a browser on our computer and use as address the IP of the revolution Pi and the port 1880. http://revpi-ip-address:1880/ For our setup we need the “node-red-dashboard”. We install this by clicking on the menu on the top right and select “Manage palette”. In the opened dialog we change to the tab “Install” and enter “node-red-dashboard”. After clicking on “install” the node is automatically installed (can take some time, especially on a Core 1). Then refresh the browser cache (Ctrl + F5) and see if the new dashboard nodes appear at the bottom of the left list: We place a “mqtt” node in our “Flow 1” from the left side of the category “Input”. Then double-click on the new MQTT node and we will see the settings “Edit mqtt in node”. Once there we have to specify the MQTT broker by clicking on the little pen next to “Add new mqtt-broker …”. In the following dialog, we only enter the value localhost under “Server”. Click on “Add” in the upper area and the broker is saved. Now let’s go back to the features of our first MQTT node. This has taken over the new broker automatically and would like to have an entry for “Topic”. As a topic we now use the value under which our Revolution Pi sends values of the IOs. In our example this is “revpi8143/io/temp_heater”. Then save with “Done”. We also repeat this for the topic “revpi8143/io/temp_outside”. Now we select the node “debug” from the category “output”, place it in our “Flow 1” and connect the outputs of our MQTT-Nodes to the input of the debug-node. Finally the time has come: We click on “Deploy” at the top and click on the tab “debug” on the right. There, the current values of the IOs are appended every 15 seconds: We now want to show the temperatures in °C. For this we have to divide the given value by 10. We select the node “function” on the left, place it in our flow and double-click on it. By name, we give e.g. “Divide by 10” and in the field “Function” following source code: Save with “Done” and connect the outputs of our MQTT nodes to the input node of the function. The output of our function now returns as value the temperature in ° C. We want to visually show this value. On the left side we select the node “chart” under “dashboard” and place it in our flow. Double click on the “chart” node to open the settings. There, next to “Add new ui_group”, we click on the small pen and enter the “Add new dashboard group config node” properties. Again, click on “Add new ui_tab” on the pen to create a new tab. In the “Add new dashboard tab config node” we assign the name “Home” and click on “Add”. After returning to “Add new dashboard group config node”, we assign the name “Cyclic Data” to the group. The value “Width” is set to 15 and then click “Add”. Finally back in the “Edit chart node”, we set the value for “Legend” to “Show” and click on “Done”. To save all this, we now click on top right To display our visualization, we open a new web browser and re-enter the address of Node-Red, but add /ui/ on the end. http://revpi-ip-address:1880/ui/ As we also get event-based MQTT messages, we can embed real-time displays into our visualization. We are creating two new MQTT input nodes with the topics “revpi8143/event/temp_heater” and “revpi8143/event/temp_outside”. The value for “QoS” is set to “0”! For each of these MQTT inputs, we set a separate function node with our “divide by 10” function and pass the output of the function into a “gauge” node, which we find on the left under “dashboard”. If we double-click on the “gauge” nodes, we select “Add new ui_grop” the first time under “Group” and click on the small pen. We give the new group the name “real time data” and confirm the new group with “Add”. Back in the “Edit gauge node” we set the “Range” to e.g. 0 – 50. Then save this dialog with “Done”. By double-clicking on the second “gauge” we only have to select the group “Real-time data” under “Group”, set the “Range” from 0 – 50 and confirm with “Done”. Save all changes with Try some settings of the used nodes for the visualization yourself. You can e.g. add another button which sends as value [] to empties our chart. There are now all possibilities. We will now build a small flip-flop circuit with NodeRed. For this we use our button on the input “t_flip” and our LED on the output “led2” of the Revolution Pi. For this function we again use an MQTT input node with the topic “revpi8143/event/t_flip”. This is triggered immediately when the input “t_flip” changes state. We connect the output of our node with a function node, which we find on the left in the selection list. Double-clicking on the function node opens its settings. As a “name” we assign “flipflop” and in the field “Function” we enter the following source text: Now we use a new node, which we find under “output” on the left side of the list. This is called “mqtt”, too. We set this node to our flow and open its settings with a double-click. “Server” should be set here automatically “localhost” and the topic is “revpi8143/set/led2” (important is the …/set/… in the topic). Confirm everything with “Done”. The output of our function is connected to the input of the new MQTT output node: Save our flow with If a value for a specific event is to be queried (for example, by clicking on a button), the MQTT output node can also be used with the topic “basetopic/get/ioname”. The Revolution Pi then immediately sends the value of the input or output via MQTT back to the topic “basetopic/io/ioname”, which can be received via MQTT input nodes.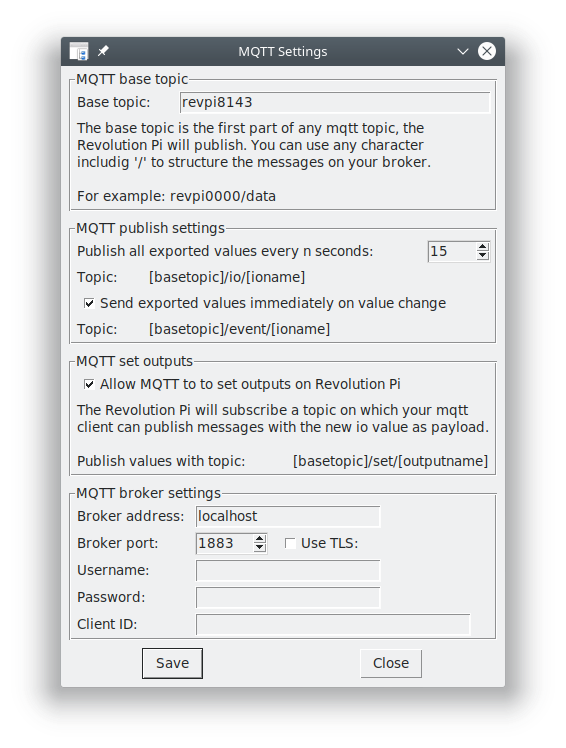
We set the “Base topic” e.g. on “revpi8143“, the transmission interval to 15 seconds and the broker address on localhost (127.0.0.1)! We can leave username, password and Client ID empty. These need only be set if we use an external broker or if our local mosquito has user authentication.pi@RevPi0000:~ $ sudo nano /etc/revpipyload/revpipyload.conf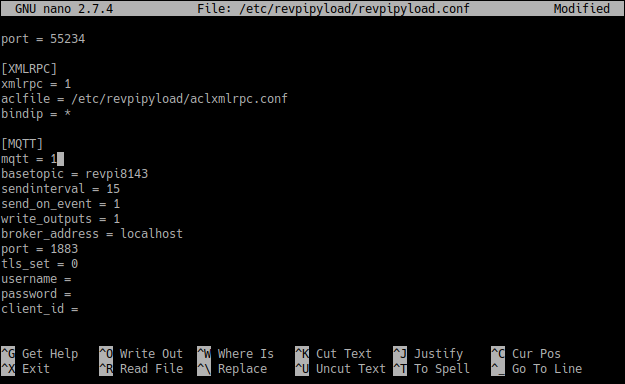
mqtt = 1, basetopic = revpi8143 and sendinterval = 15. At the broker address we use localhost, because it is installed on our Revolution Pi broker_address = localhost. Of course we can also quote another broker here. username, password, and client_id can be left blank if it’s the local broker.send_on_events = 1 for our examplepi@RevPi0000:~ $ sudo service revpipyload restartpi@raspberrypi:~ $ mosquitto_sub -t "#" -v
revpi8143/io/temp_heater 215
revpi8143/io/temp_outside 227
revpi8143/io/door_corridor 0
revpi8143/io/door_workshop 0
revpi8143/io/t_flip 0
revpi8143/io/I_4 0
revpi8143/event/Core_Temperature 58
revpi8143/event/Core_Temperature 57
(...)
revpi8143/io/... are the cyclically transmitted values. The entries with revpi8143/event/... are the values of the IOs that are sent immediately when the value changes.Prepare NodeRed
pi@RevPi0000:~ $ cat /etc/issue
Raspbian GNU/Linux 9 \n \l \4 \6
# Update the complete system
pi@RevPi0000:~ $ sudo apt-get update
pi@RevPi0000:~ $ sudo apt-get dist-upgrade

# For the installation of the nodes we need npm
pi@RevPi0000:~ $ sudo apt-get install npm

# Start NodeRed with Revolution Pi
pi@RevPi0000:~ $ sudo systemctl enable nodered

# Start NodeRed now
pi@RevPi0000:~ $ sudo systemctl start nodered
# Update the complete system. NodeRed will not be updated, this must
# be done later
pi@RevPi0000:~ $ sudo apt-get update
pi@RevPi0000:~ $ sudo apt-get dist-upgrade

# For the installation of the nodes we need npm
pi@RevPi0000:~ $ sudo apt-get install npm

# Update NodeRed to use all new functions
pi@RevPi0000:~ $ sudo npm install -g n
pi@RevPi0000:~ $ sudo n stable

# Start NodeRed with Revolution Pi
pi@RevPi0000:~ $ sudo systemctl enable nodered

# Start NodeRed now
pi@RevPi0000:~ $ sudo systemctl start nodered
First step: set up MQTT

Second step: small IoT solution
msg.payload = msg.payload / 10;
return msg;

![]()
Third step: Expansion of the IoT solution

![]() in Node Red and view our advanced visualization:
in Node Red and view our advanced visualization: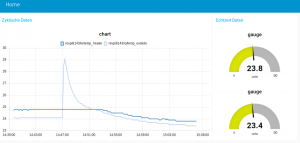
Fourth step: set outputs
if(msg.payload == 1){
    if (global.flipflop) {
        global.flipflop = false;
    }
    else {
        global.flipflop = true;
    }

    msg.payload = global.flipflop;
    return msg;
}

![]() and the button “t_flip” can set and reset the output.
and the button “t_flip” can set and reset the output.Extras