Here’s a quick first start with the RevolutionPi to test IOs without having to program a single line! Then we write a Python control program an load it on the RevPi!
You can read all about the wiring of the Revolution Pi and die DIO module in the Kunbus documentation. They explain the SSH access there, too.
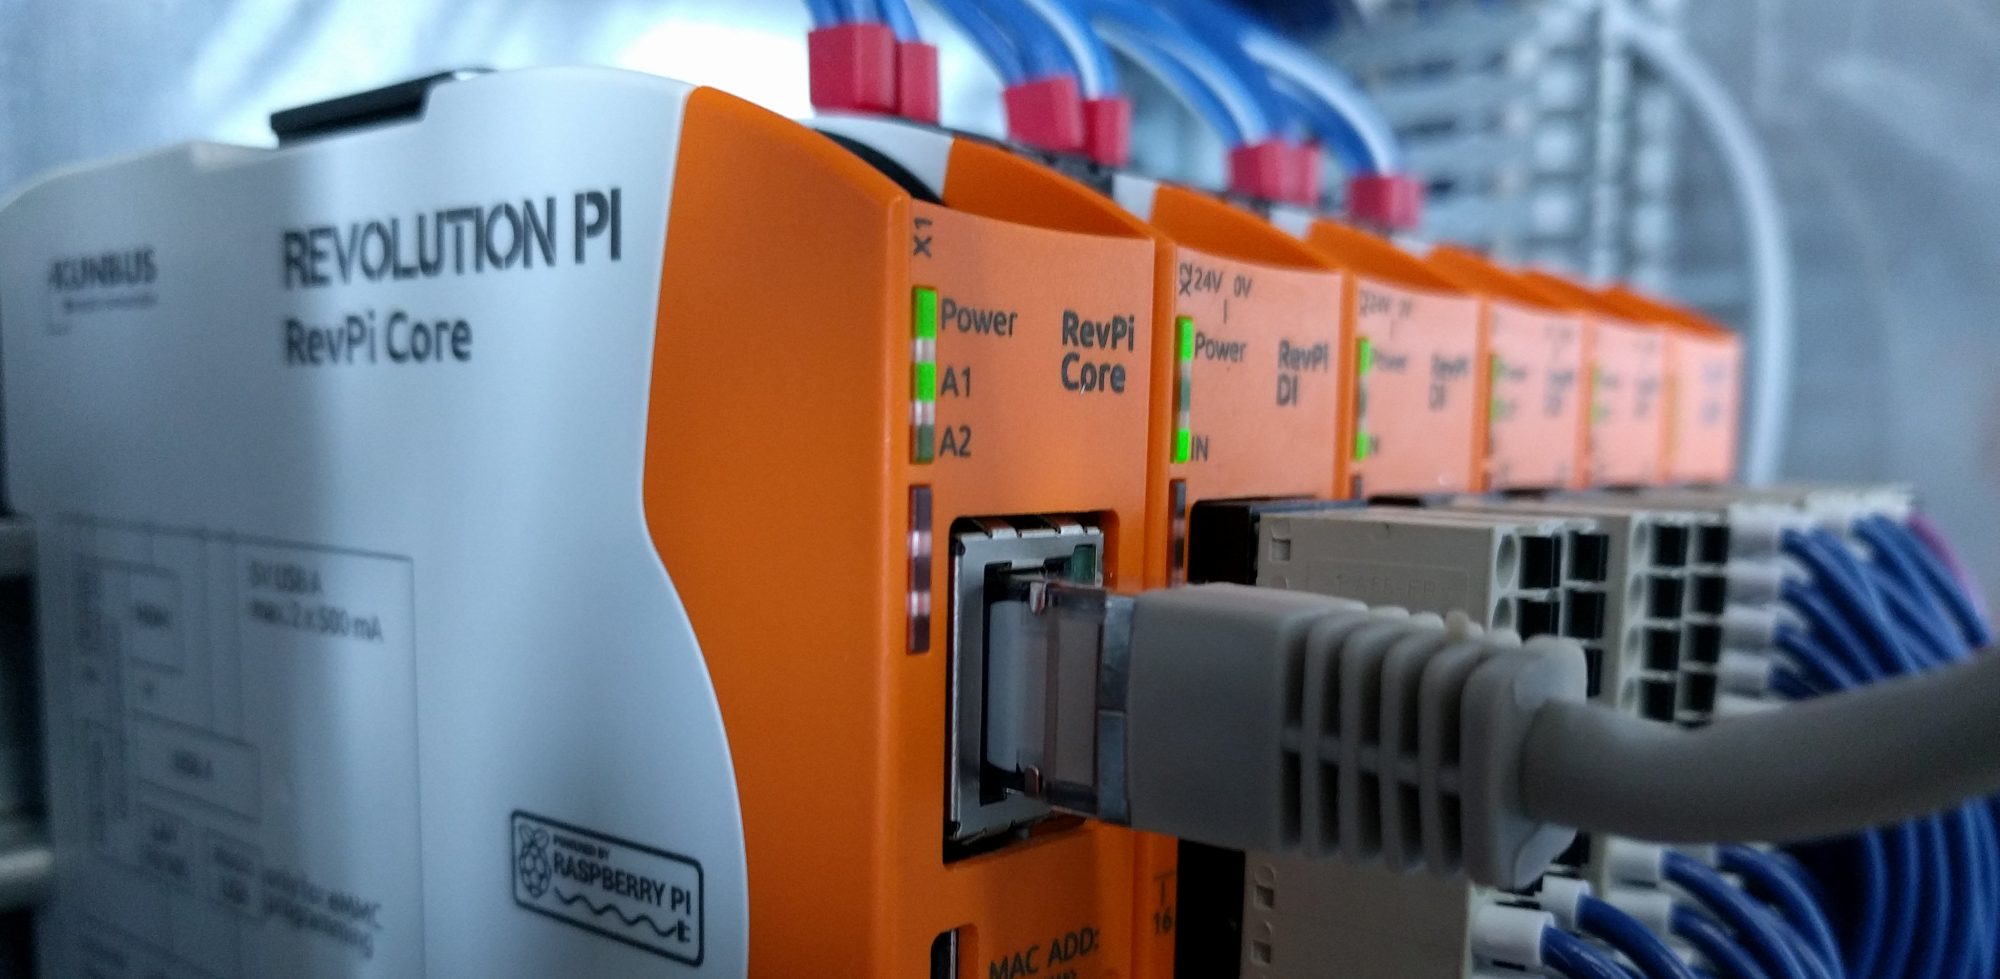
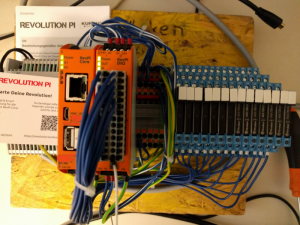
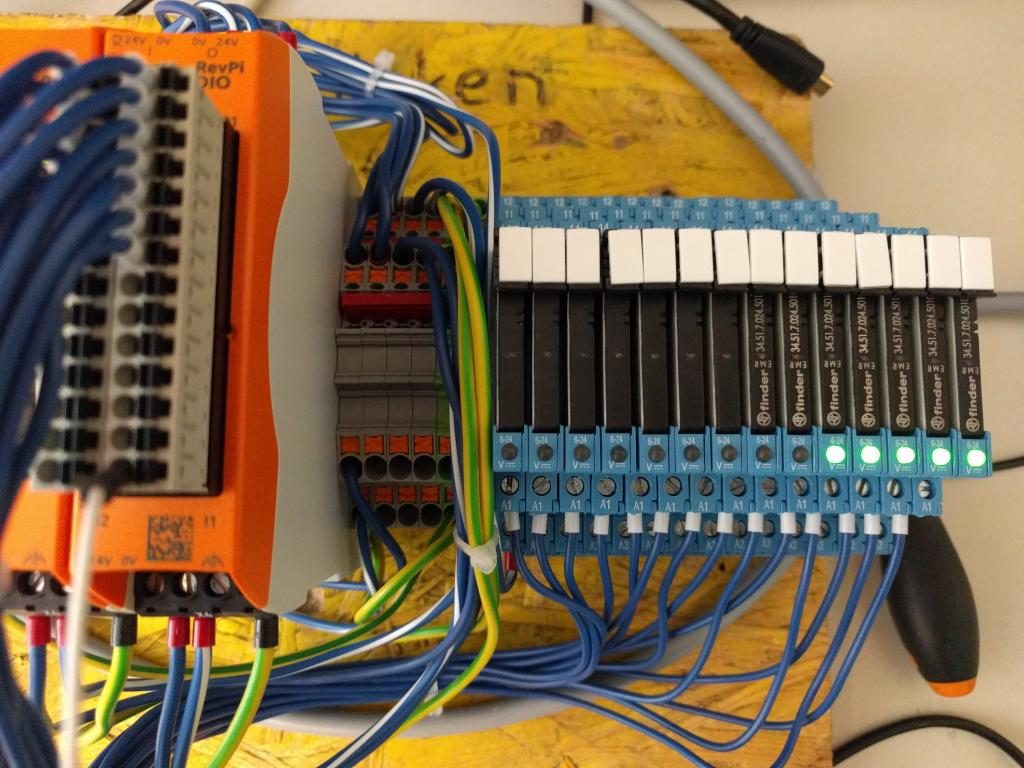
Our hardware setup
RevPi Core / DIO -> Outputs are directly connected to the relays
Hardware configuration
We configure our RevPi hardware with piCtory on the Revolution Pi.
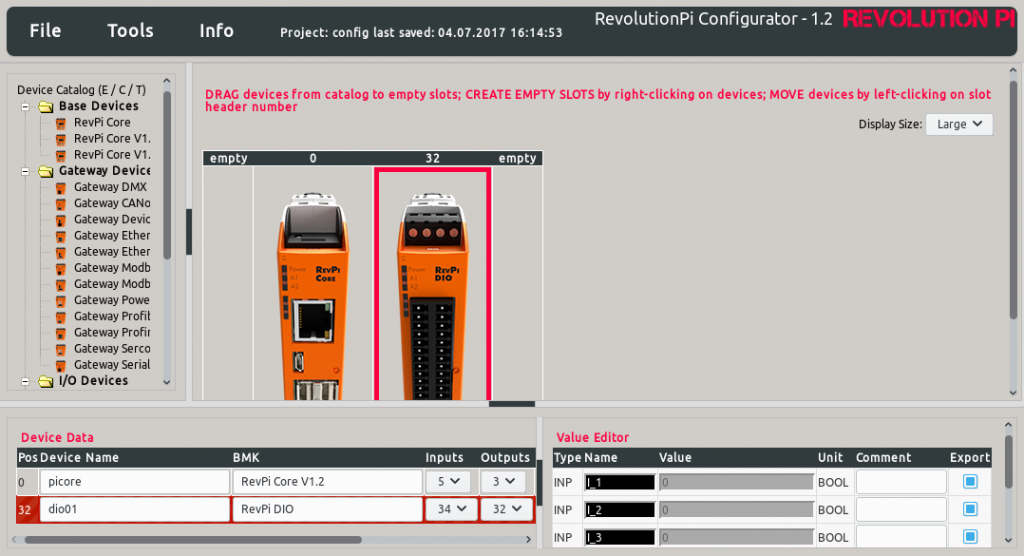
For the DIO module we use the “Inputs: 34 / Outputs: 32” setting, to get each Input and Output as a single BIT in the piCtory “Value Editor”!
File->Save and Tools->Reset Driver to save and activate the new configuration.
Install RevPiPyLoad on the RevPi
Now we connect to our RevPi via SSH (or use the internal monitor and USB keyboard) and install the needed software (jessie, stretch images uses the Kunbus repositories).
# Update repositories
pi@RevPi0000:~ $ sudo apt-get update

# Install RevPiPyLoad
pi@RevPi0000:~ $ sudo apt-get install revpipyload
Note: If you have the old wheezy image without Kunbus repositories, use this instructions: Downloads an sources
For the RevPiPyLoad service, we still need to enable the XML-RPC server, which is disabled by default during installation. This allows us to access the RevPi via the network.
pi@RevPi0000:~ $ sudo nano /etc/revpipyload/revpipyload.conf
In the editor we set in the [XMLRPC] section the value xmlrpc = 1 (before 0). This activates the general XML-RPC functions.
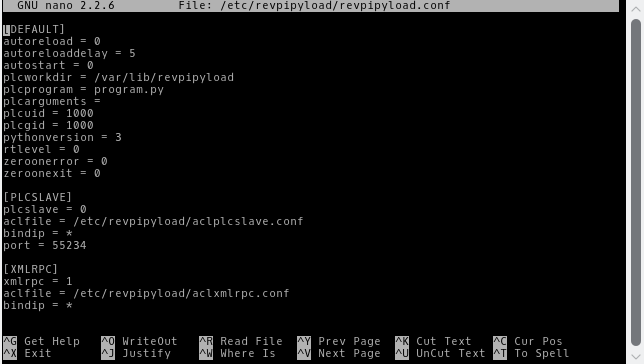
Press Ctrl+X to save the changes and type y to confirm.
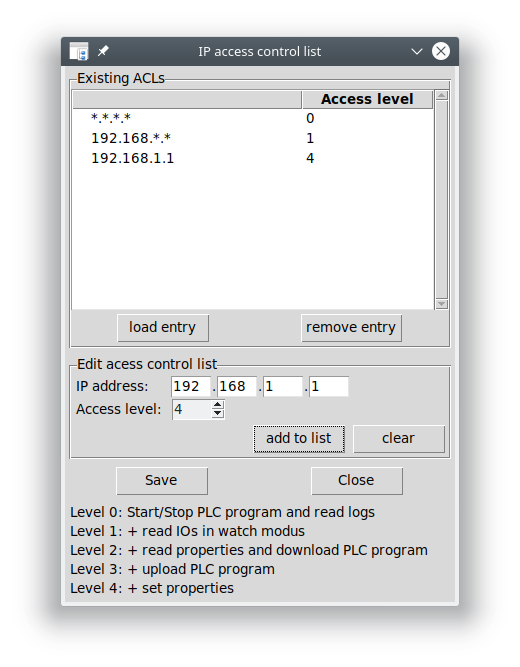
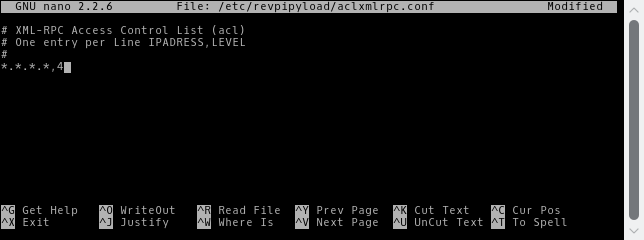
Now permissions have to be set for the access! For this we edit the file aclxmlrpc.conf in the same way:
pi@RevPi0000:~ $ sudo nano /etc/revpipyload/aclxmlrpc.conf
Each line specifies an IP address an the associated authorization level from 0 – 4. IP groups can be defined with a *. For testing, we allow ALL IP address, as these settings can also be done much more comfortable via the graphical interface later.
Here you can find more information about “Parameters in XMLRPC section”: https://revpimodio.org/en/revpipyplc-2/revpipyload/
Now we have to restart the RevPiPyLoad service to apply the new settings.
pi@RevPi0000:~ $ sudo service revpipyload restart
Install RevPiPyControl on your computer
The program can be downloaded in downloads and sources. We have a setup program for Windows users and a Debian package for Linux users. In general, the sources can be used if Python3 is installed on the computer. Then only the revpipycontrol.py needs to be run with Python.
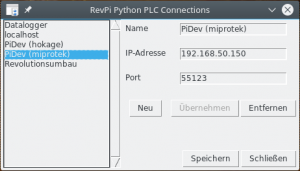
Via the menu item Main -> Connections… we set up our RevPi with a free name and the IP address. The port is 55123 in default:
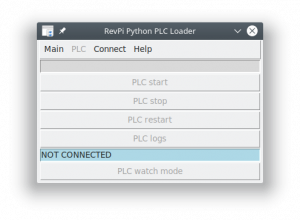
After saving and closing, we can connect via the menu item Connect -> RevPiName. The “PLC watch mode” button becomes active, which we click!
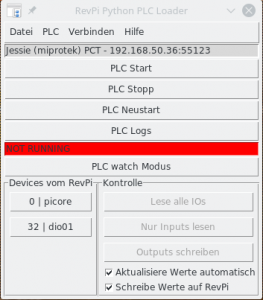
Here we see our hardware configuration at “Devices of RevPi”. By clicking on “32 | dio01” (position | name from piCtory), a window opens in which we can see the status of the IOs.

If we activate the checkbox “Autorefresh values”, the values of the IOs are automatically updated in the background. If we now set input “I_1”, we see a check mark.
If in addition “Write values to RevPi” is activated, we can set outputs directly on the RevPi.
If we select “O_10” – “O_14”, the RevPi set the outputs IMMEDIATELY!!!
Have fun with your IO-Check without having programmed a line 😀
Write and upload control program
Now we can write a Python control program on our computer and transfer it via the graphical tool to the RevPi. There RevPiPyLoad takes care of its execution and supervises it.
Simply select PLC -> PLC program… select the control program on your computer and upload it.
PS: The authorizations of the IP addresses can be changed via PLC -> PLC options… In the lower part next to “Activate XML-RPC server on RevPi” click on “Edit ACL”. The permissions can be adjusted in the window: